
MicroZed Chronicles: ZUBoard 1CG and PYNQ
- Apr 12, 2023
- 3 min read
Updated: Jun 25, 2025
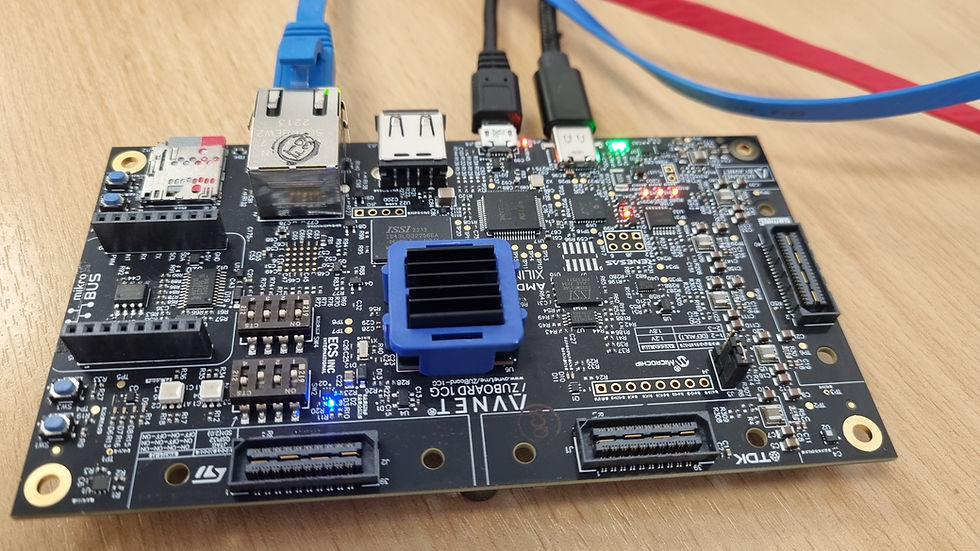
You might have noticed several posts on the Avnet ZUBoard 1CG over the last six months. This board contains an AMD Xilinx ZU1CG MPSoC along with a range of interfacing solutions such as high-speed interfacing and Mikroe Click. I received one of the prototype boards because we have been working with Avnet to develop an online three-day training course which looks at the hardware, software, and PetaLinux aspects when working with the ZUBoard 1CG. As production boards are now available, I thought it would be good to take another look.
Regular blog readers will also know that I am a big fan of PYNQ. I was very happy to see that, along with the release of board material and reference designs to build the basic hardware, software, and PetaLinux solutions on GitHub, there is also a PYNQ image for the board created by my good friend at Avnet Fred Kellerman.
You can download the PYNQ board image from the pynq.io and it complies with PYNQ 3.01 which was all built around the AMD Xilinx 2022.1 tool chain. This is important for when we want to create our own overlays which we will look at later.
Once we have downloaded the PYNQ image, we need to write to a SD card. If this is the first time booting the board from the SD card, we need to set the boot mode to SD card. This can be done by setting switches SW2 to the SD Card pattern (OFF, ON, OFF, ON) when the board is powered off.

Like always, you need to provide an Ethernet connection to either your development machine or the network connected to your development machine to work with PYNQ.
With the boot mode set, SD card inserted, and all cables connected, we can power on the ZUBoard 1CG and wait for the PYNQ image to boot. Once the boot process completes, we can open a browser and go to PYNQ:9090 and log into the Jupyter Notebook from which the designs are run.

The PYNQ example which comes with the board is an accelerated Mandelbrot. Loading this notebook and downloading the overlay enables us to draw the Mandelbrot fractal and then zoom and pan in around as it is regenerating the fractal to observe elements of interest. I can lose hours looking around and zooming in on the fractal. It’s a great example for PYNQ to be deployed with.


I also decided that it would be good to create my own overlay and actually decided to recreate an overlay which we had done previously on a Zynq 7000-based board for Chronicle 448. That showed how we can create a FFT-based solution and look at its performance when implemented in software vs hardware accelerated. As there are several steps to recreate this, I have updated and created a new Git repo with the notebook, overlay, and a step-by-step guide to recreate the overlay.

When I ran the overlay on my ZUBoard 1CG, I could see a significant performance increase when running in the hardware and even an increase over the previously accelerated example that we did on the Zynq 7000-based device. This was to be expected because we had a higher clock rate thanks to the UltraScale+ fabric in the PL.


I think the ZUBoard 1CG is going to be popular, especially at the price point. It will be featured in many more blogs and projects this year.
Workshops and Webinars
If you enjoyed the blog why not take a look at the free webinars, workshops and training courses we have created over the years. Highlights include
Introduction to Vivado learn how to use AMD Vivado
Ultra96, MiniZed & ZU1 three day course looking at HW, SW and Petalinux
Arty Z7-20 Class looking at HW, SW and Petalinux
Mastering MicroBlaze learn how to create MicroBlaze solutions
HLS Hero Workshop learn how to create High Level Synthesis based solutions
Perfecting Petalinux learn how to create and work with petalinux OS
Embedded System Book
Do you want to know more about designing embedded systems from scratch? Check out our book on creating embedded systems. This book will walk you through all the stages of requirements, architecture, component selection, schematics, layout, and FPGA / software design. We designed and manufactured the board at the heart of the book! The schematics and layout are available in Altium here Learn more about the board (see previous blogs on Bring up, DDR validation, USB, Sensors) and view the schematics here.
Sponsored by AMD Xilinx


