
Lattice Propel RISC-V, Part Two Software Development.
- Jan 6, 2023
- 4 min read
Updated: Jun 26, 2025
A few weeks ago, we examined how we could create the hardware element of a RISC-V processor using Lattices Propel tool.
The culmination of this hardware blog was a programming file which contained a RISC-V MC 32-bit processor implemented in the targeted Nexus Certus™-NX LFD2NX-40 device. When initially generated however this programming file does not contain a software application to run on the processor.
In this blog I am going to demonstrate how to create the application software, how to debug the application software along with how to create bit files which contain the SW application.
To get started we need to open the Propel Software environment which is eclipse based. The propel software environment can be opened from the Propel Builder environment.
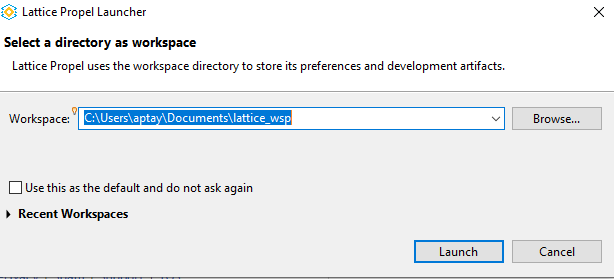
The first stage of creating the software application is to define the project workspace, the workspace is where the source code, board support software, build and debug artefacts will be stored.
Once the Propel software environment opened the next step is to create a C/C++ project. The important thing we need here is the System Env File this is an XML file which defines the configuration of the system within Propel Builder. When we launch this directly from Propel Builder this should be automatically detected, if you opened propel on its own you will find it under the SGE, directory in the project builder project folder structure.

With the system environment file selected, the system information of device family, processor and instance names should also be shown.
The next tab is the application selection, for this example I selected the Hello World RISC-V C Project.

With the environment, and the template selected we are then able to enter the basic settings which will be used for the application creation.

The final stage is to select the configuration of the tool chain, one thing to remember with embedded softcore micros is that memory is limited as we are running from internal block memory. As such we want to ensure the size of the compiled application fits in the allocated memory, Printf is one function which can be very large when compiled and as such to reduce the complied application size the toolchain tab enables you to select the most appropriate, for the application needs to enable the optimal size of the compiled application.

This example will create a simple helloworld application, this will flash 8 LEDS in sequence and send out a hello world message.
For this application I am going to modify the printf to send out the LED counter over the UART, this UART will be captured by the RPI PICO on the board and output over USB serial port.
<source code>
Once the source code has been updated, we can compile the application and debug it on the target processor. To do this we need to first power on the board, program the application bit stream, with the bitstream programmed in propel we can create a new debug configuration which downloads the application to the processor and enables us to single step, breakpoint and debug the application as one would in normal software development.
The debug setting for this application can be seen below

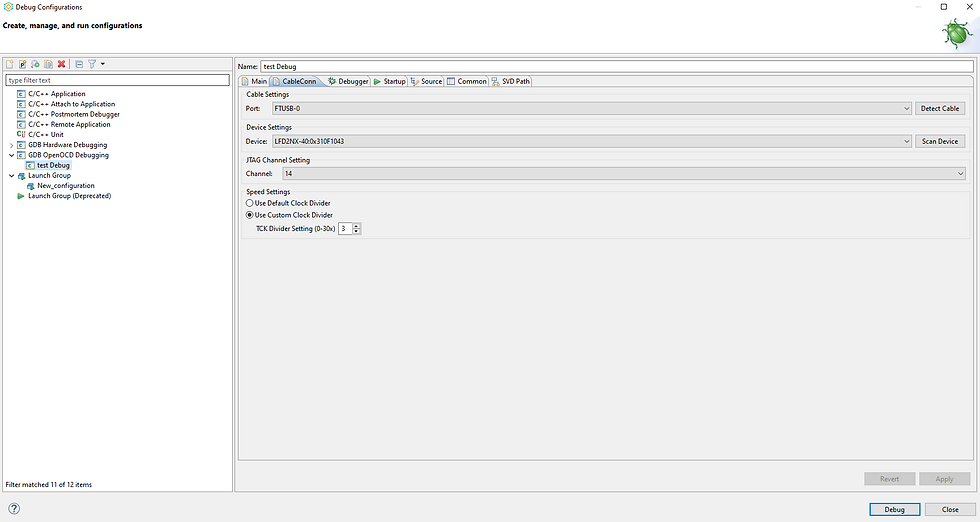
Debugging the application will cause the software to be downloaded, and paused for execution. Propel will as the application is downloaded, ask if you want to switch the view to one specific for debugging.

This debugging perspective shows the breakpoints, memory watches, register settings etc. the execution of the program will pause at the start of the main() function.
With the application completed and functioning as desired, we of course want to merge the application with the bit file to enable it to be downloaded into a configuration memory. This will ensure that when the FPGA is programmed from the configuration memory the processor is instantiated and the application executed from the configured block RAM.
To merge the software application with the programming file we use the ECO Editor within Radiant. On the Memory Instance tab, we are able to select the .mem file which is generated within propel when the application is compiled to be merged into the appropriate memory (select hexadecimal file).
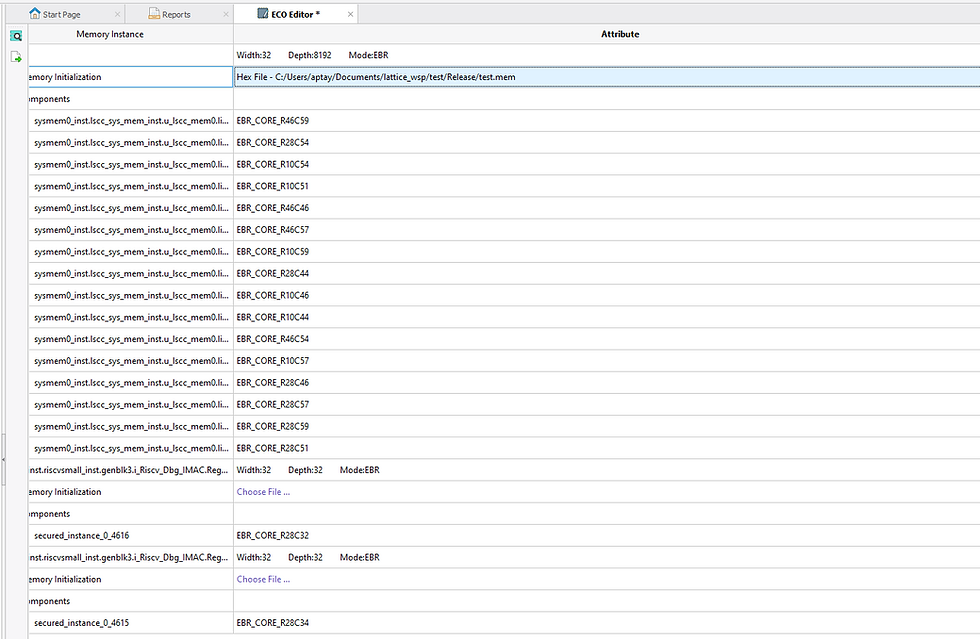
Rerunning the export of the files in radiant will re generate the bit file with the software application contents added to the appropriate memory. With the updated bit file, we can download the bit file using the radiant programmer and once completed the software application will start running.
The final stage of course of any development is to program a configuration prom, in the case of this board we have a SPI memory connected.
I used the Radiant programmer to the program the SPI memory with the bit file which was generated using the ECO flow.
To do this initially in the Radiant programmer, we need to configure the SPI serial flash options including the target device and the programming file.

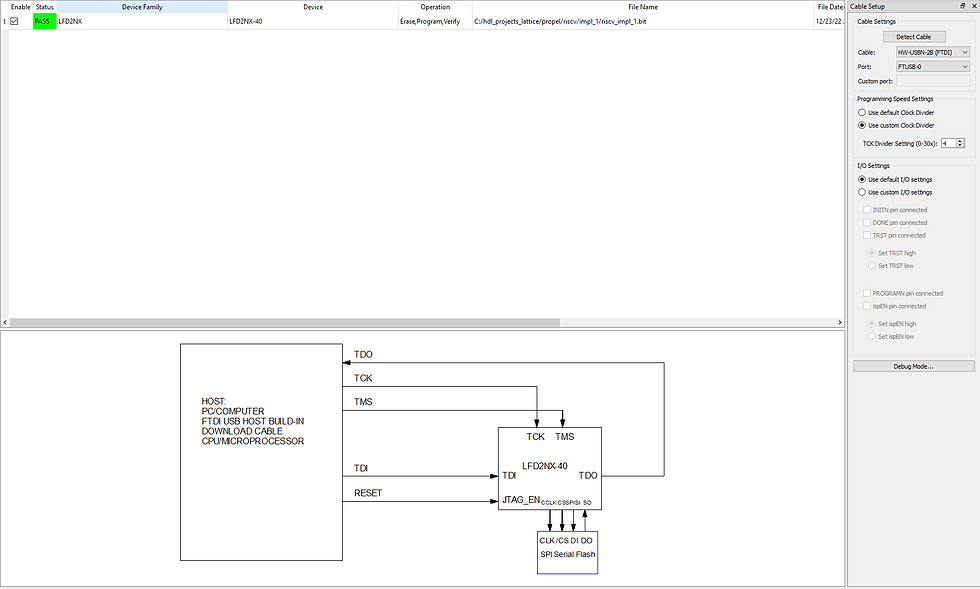
With the SPI device programmed, we can power off the board, remove the JTAG Pod and power on the board again. Once configured the processor should start executing its application once the FPGA is configured.

Now we know how to create both the hardware and software element of the application, we will be looking at more complex solutions and elements of the design.

